

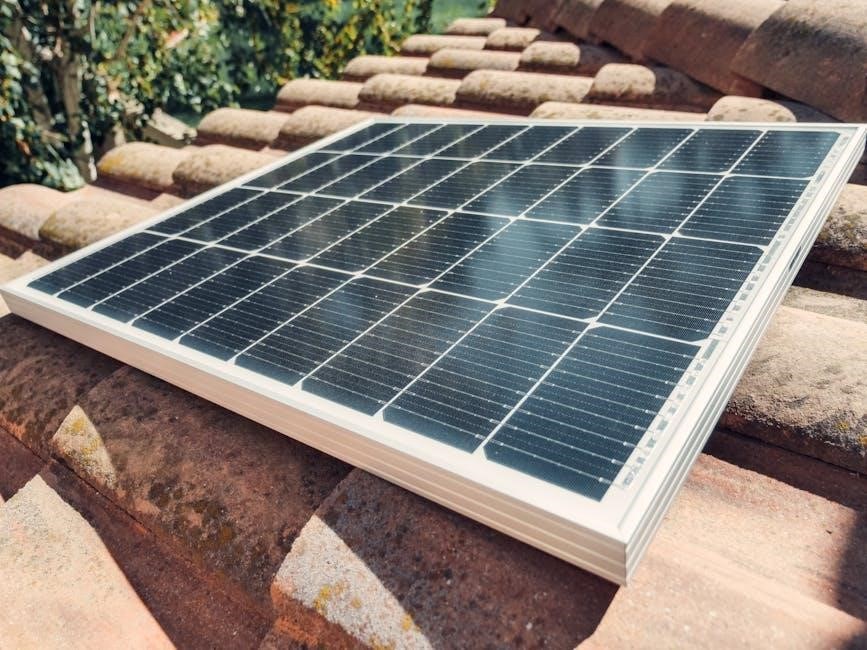
tile roof installation guide pdf
This guide provides essential information for installing tile roofs, ensuring durability and weather resistance. Proper techniques and materials are highlighted for a secure and aesthetically pleasing finish.

It serves as a comprehensive resource, covering preparation, underlayment, battens, and final touches, ensuring a professional-grade installation for both beginners and experienced contractors.
Purpose of the Guide
This guide is designed to assist contractors, architects, and homeowners in understanding the proper techniques for installing tile roofs. It provides detailed instructions, best practices, and essential information to ensure successful outcomes. By following this guide, users can gain a comprehensive understanding of materials, tools, and step-by-step processes required for a secure and durable tile roof installation. The goal is to enhance knowledge and skills, ensuring safety, efficiency, and quality in every project;
Importance of Proper Installation
Proper tile roof installation ensures durability, weather resistance, and structural integrity. Correct methods prevent leaks, damage, and costly repairs, while adhering to safety and building codes. A well-installed roof enhances energy efficiency and extends lifespan, safeguarding the property and occupants from environmental stresses.
Good installation practices also maintain the aesthetic appeal of the roof, preserving its value and curb appeal. Proper techniques are vital for withstanding harsh weather conditions and ensuring long-term performance.
Preparation for Tile Roof Installation
Assess the roof structure to ensure it can support tile weight. Gather all necessary tools and materials, and secure required permits before starting the installation process.
Assessing the Roof Structure
Before installation, evaluate the roof’s condition, load-bearing capacity, and structural integrity. Ensure it can support the weight of tile roofing materials. Inspect for any damage or weaknesses that may require repairs. Verify that the roof deck aligns with local building codes and specifications for tile roofing systems. This step is crucial for a safe and durable installation, preventing future issues like sagging or leaks.
Gathering Necessary Tools and Materials
Essential tools include tile cutters, drills, screwdrivers, and safety gear like gloves and harnesses. Materials needed are tiles, underlayment, battens, fasteners, flashing, and sealants. Ensure all items are compatible with your roof type and climate. Organize tools and materials beforehand to streamline the installation process and avoid delays. Proper preparation ensures efficiency and safety throughout the project.
Obtaining Permits and Approvals
Before starting your tile roof installation, ensure all necessary permits and approvals are secured. Check local building codes and regulations to comply with requirements. Obtain permits for roof modifications or new installations to avoid legal issues. Ensure your design and materials meet safety and structural standards. Proper documentation and inspections are crucial for approval. This step guarantees your project adheres to local guidelines and standards, ensuring a safe and durable roof installation.
Installing the Underlayment
Underlayment is crucial for waterproofing and protecting the roof deck. Ensure a watertight seal by carefully laying and anchoring the material according to manufacturer instructions.
Use high-quality underlayment materials and secure them properly to prevent leaks and ensure durability. This step is vital for the longevity of your tile roof system.
Choosing the Right Underlayment Material
Choosing the right underlayment material is critical for a durable and weather-tight tile roof. Options include bitumen-backed tile underlayment, synthetic underlayment, and traditional asphalt-saturated felt. Each material offers varying levels of moisture protection, breathability, and compatibility with tile types. Consider factors like climate, roof slope, and local building codes to select the most suitable option. Proper underlayment ensures a strong foundation, prevents leaks, and enhances the longevity of your roof system.
Methods for Securing the Underlayment
Ensure the underlayment is tightly fastened to the roof deck using mechanical fasteners like nails or staples. Proper spacing and tension are crucial to prevent wrinkles or gaps. For added security, apply adhesive along the edges to reinforce the bond. Always follow manufacturer guidelines for specific materials and climates to guarantee a watertight seal and long-lasting performance.

Setting Up Battens and Tile Placement
Properly setting up battens ensures a stable base for tiles, aligning them for even placement and structural integrity. This step is crucial for a durable roof.
Battens are spaced according to tile size, with tiles secured firmly to prevent shifting. This ensures a tight, weatherproof seal and enhances the roof’s longevity.
Positioning and Fixing Battens
Battens are essential for providing a secure base for roof tiles. They should be spaced evenly, typically between 600mm and 1200mm apart, depending on tile size and roof pitch. Ensure battens are aligned parallel to the eaves and fixed securely using durable screws or nails.
Proper alignment ensures even weight distribution and prevents structural issues. Use a spirit level to check battens are straight and plumb. Overhangs should be minimal, and cuts should be clean to maintain stability and avoid material waste during installation.
Aligning and Spacing Roof Tiles
Proper alignment and spacing of roof tiles are crucial for a secure and visually appealing installation. Ensuring each tile is evenly spaced and aligned prevents structural issues and enhances durability. Use chalk lines to guide placement, maintaining consistent gaps as specified by the manufacturer. Proper spacing allows for expansion and contraction due to temperature changes, preventing cracks and damage.
Begin by aligning the first row with the roof’s edge, then use spacers or battens to maintain uniformity. Double-check spacing at valleys and ridges to ensure a watertight seal. Correct alignment and spacing are key to achieving a professional-grade finish and maximizing the roof’s lifespan.

Flashing Installation
Flashing is critical for preventing water infiltration at roof intersections, such as vents and valleys, ensuring a watertight seal with proper installation techniques.
Types of Flashing for Different Roof Areas
Flashing is essential for preventing water infiltration at roof intersections. Common types include vent pipe flashing for vents, valley flashing for roof valleys, and chimney flashing for chimneys. Each type is designed to seal specific areas, ensuring water tightness. Proper installation of flashing materials, such as metal or rubber, is critical to prevent leaks and maintain roof integrity.
Techniques for Sealing Vents and Valleys
Proper sealing of vents and valleys ensures water tightness. Use rubber or metal flashing, applying waterproof adhesives. Ensure vents are tightly fitted and valleys are sealed with overlapping flashing. Regular inspection is crucial to prevent leaks and maintain structural integrity.
Finalizing with Ridge Tiles
Ridge tiles are placed along the roof’s peak, overlapping the top of tiles by at least 75mm to ensure a secure and weather-tight seal.
Installing Ridge Tiles for a Secure Finish
Ridge tiles are placed along the roof’s peak, ensuring a watertight seal. They must overlap the top of the tiles by at least 75mm for maximum protection against weather conditions.
Secure the ridge tiles using appropriate fasteners, such as screws or nails, and apply a bead of sealant between tiles to prevent gaps; Proper alignment and tight fitting are crucial for a durable and visually appealing finish.
Ensuring Proper Overlap and Seal
Proper overlap and sealing are critical for a watertight roof. Ensure ridge tiles overlap by at least 75mm and align with the roof’s peak. Use waterproofing compounds to seal gaps between tiles and flashing. Regularly inspect overlaps for tightness, especially after extreme weather. Proper sealing prevents leaks and enhances durability, ensuring a long-lasting, weather-resistant finish.
Ventilation and Additional Features
Proper ventilation ensures airflow, preventing moisture buildup and extending roof lifespan. Additional features like specialized vents and systems enhance durability and energy efficiency in tile roofing.
Importance of Roof Ventilation
Proper roof ventilation is vital for maintaining the integrity and longevity of a tile roof. It prevents moisture buildup, reduces heat accumulation, and minimizes the risk of structural damage. Adequate ventilation ensures airflow beneath the tiles, protecting the underlayment and roof deck from rot and mold. This practice also helps regulate roof temperature, preventing ice dams in colder climates. Incorporating ventilation systems, such as eaves, ridge, and tile-based vents, is essential for a durable and weather-tight roofing system.
Installing Ventilation Systems
Ventilation systems are crucial for maintaining airflow and preventing moisture buildup. Install vents at eaves, ridges, and hips to ensure proper circulation. Use flashed vents to seal against weather.
Follow manufacturer guidelines for placement and spacing. Ensure vents align with roof pitch and tile layout. Secure systems firmly to withstand wind and weather conditions. Proper installation enhances durability and energy efficiency.
Maintenance and Repair
Regularly inspecting for cracks, loose tiles, and debris ensures longevity. Addressing issues promptly prevents minor damage from becoming major problems, maintaining the roof’s structural integrity and appearance.
Regular Inspection and Upkeep
Regular inspection ensures the longevity of your tile roof. Check for damaged, missing, or loose tiles and address them promptly to prevent leaks and structural issues.
Clear debris from valleys and gutters to maintain proper water flow. Inspect flashing around vents, chimneys, and skylights for tight seals. Annual professional checks can catch hidden problems early, ensuring your roof remains durable and weather-tight for years.
Addressing Common Issues
Common issues during tile roof installation include cracked tiles, improper sealing, and misaligned battens. Regular inspections can identify these problems early. Ensure weatherproofing materials are applied correctly to prevent leaks. Loose tiles should be resecured promptly to avoid further damage. Proper ventilation installation is crucial to prevent moisture buildup. Always follow manufacturer guidelines for repairs to maintain the roof’s integrity and longevity. Addressing these issues promptly ensures a durable and weather-tight roof system.